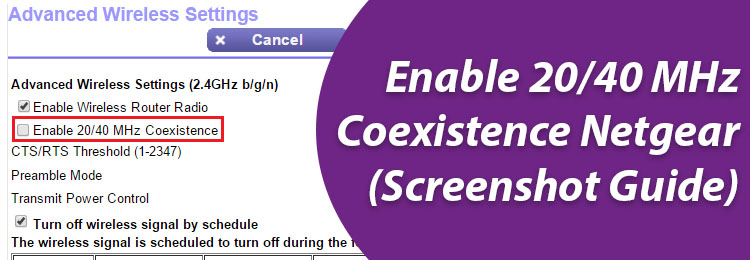
20MHz and 40MHz are channel bandwidths that can be directly compared with the number of lanes on a highway through which your data can travel via the WiFi network. The more space the lane covers, the more the data transcations happening there. Increasing the channel bandwidth helps in enhancing the speed and throughput of a wireless network. In this blog, we will particularly talk about the instructions to enable 20/40 MHz coexistence on a Netgear router. But, should you really enable the existence of both frequency bands? Will it be of any help? This blog will answer all such queries.
We are too much dependent on technology and we cannot deny this fact. With that being said, we have a number of WiFi gadgets in our house including the Netgear router. The frequencies emitted by the NetgearWiFi router are most likely to get interrupted and distorted due to those emitted by other gadgets. Let’s not forget home appliances majority of which run on the 2.4GHz frequency.

If you enable 20/40 MHz coexistence on your NetgearWiFi router, the chances of WiFi interference automatically get reduced. In this case, the router uses the 40 MHz bandwidth from the 2.4 GHz frequency band until another device broadcasting the same frequency i.e. 40 MHz bandwidth is detected. The broadcasted frequency automatically falls back to 20 MHz in this scenario due to which WiFi interference gets minimized.
The table given below will help you understand clearly about the maximum PHY rate per stream in Mbps. This is to inform you that PHY stands for Physical layer rate which can be defined as the maximum speed through which you can perform data transactions across a wireless link. In simple words, it is the maximum achievable speed with which data can move between your wireless client device (laptops/mobiles/ tablets) and Netgear router.
| Channel Width (MHz) | Max PHY Rate (Mbps) |
|---|---|
| 20 | 143 |
| 40 | 287 |
With the coexistence of both these channel widths, you will be able to automatically switch between the maximum physical layer transmission rates. Now, let us directly focus on the instructions using which you can enable the coexistence of the 20/40 MHz channel bandwidths on a Netgear router.
You need to get your hands on a wireless client device (laptop/ mobile phone) to enable the coexistence of the bands on your home network. After that, connect it to the Netgear router WiFi and open a web browser. Navigate to the web address bar and type routerlogin.net or http://192.168.1.1. Press Enter to reach the login window.
Now, on the administrative portal of the router, you will be asked to input the user name and password. Remember that this user name and password are different from the WiFi name and WiFi password. FYI, the default password of the router is passwordand the user name is admin. You can go with these details if you haven’t customized them during the router’s installation.
The BASIC Home screen or the Status page of the Netgear router will show up now. To proceed further, you should select ADVANCED > ADVANCED SETUP. Thereafter, hit WIRELESS SETTINGS. In case you are an owner of a Pro gaming router, you should choose SETTINGS > WIRELESS SETUP. A window displaying the wireless configuration of the router will show up.
The last thing you need to do is look for the ENABLE 20/40 MHz Coexistence check box on the router’s dashboard. You need to check it. Once done, click or tap APPLY. The existence of both frequency bands is now successfully enabled on your WiFi router. There will be less network congestion from now onwards.
Enabling the WiFi bands coexistence is all about reducing the WiFi interference occurring due to a number of gadgets. The process to enable the 20/40 MHz coexistence is also simple as you only have to access the Advanced Settings of the router after logging in to it and check a simple box. We are now hopeful that you will have a smooth networking experience with the router.
Tags: enable 20/40 mhz coexistence, routerlogin.net