The Netgear router WGR614 is a Wireless G (802.11G) standard router. It comes with an installation Gear Box CD that provides the information regarding different ISPs for router setup. However, some users find it difficult to understand it.
To help them out, we have penned down this simple guide. It will help a person to complete routerlogin and make his/her Wireless G-router up and running with ease. Before you start, it recommended that take notes of the broadband settings from your cable company.
The installation process of the WGR614 router has been divided in three steps. Refer to each section in the same sequence as they are mentioned and learn how to:
The first step in setting up or configuring the Wireless G router is to create hardware connections that include connecting router to DSL services and PC. Here’s how to do that:
Note: The Ethernet cables used by you for the direct connections related to the Wireless G router must be free of any kind of damages.
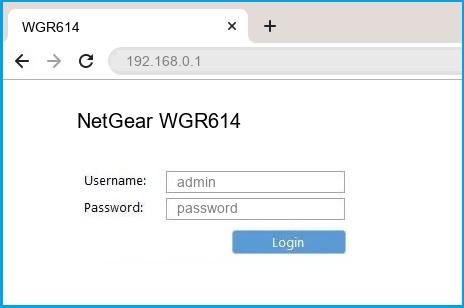
As soon as switch on the DSL modem or gateway and then the computer, you will be logged in to your internet connection. You should consider cancelling it if it starts automatically. Instead, you should log in to the router and configure internet connection after that. Read the steps given below for that:
Your router’s Power light must be on.
Local lights on your router must also be lit for connected computers.
The Internet LED on your Wireless G router must also be solid as it tells you about the connection between the DSL modem and the router.
The final step after logging in is to connect the router to the internet. That is not a complicated thing. Just follow the points given below:
That’s all about how to login to Netgear router WGR 614 router and set it up without using the CD. It is anticipated that you will be able to install your WiFi router using the information given in the post.
Tags: 192.168.1.1, Routerlogin
Dave Francis is a WiFi network expert and a technical writer dedicated to helping users optimize their home networks. He focuses on providing clear, actionable steps to help readers get the best service out of their devices. With the background in Information-Technology and passion for WiFi devices, he provides practical advice and solutions for setting up and managing Wi-Fi devices. He breaks down technical issues and offers simplified solutions through easy guides and tutorials.

