10.0.0.1 is an IP address dedicated to the management process of Xfinity gateways. Millions prefer connecting their Xfinity gateways to Netgear extenders in order to gain access to a lag-free internet connection. But, in a hurry, they enable the one WiFi name feature on the extender and as a result, they get confused about the WiFi details (SSID and network key) of their Netgear extender. This post will talk about the steps to use the 10.0.0.1 Xfinity IP address to know the Netgear extender WiFi details. How it will be helpful? Let’s find out.
To deeply understand the concept, you need to know about the fact that the ONE WIFI NAME feature on the Netgear extender allows the user to run it on the same WiFi settings as the WiFi router. It means the SSID as well as the WiFi password of the extender will be the same. Since the host gateway here belongs to Xfinity, the user needs to access the default IP address to know the SSID and network key assigned to the Netgear extender. Read the next section to know how.
Here are the steps that you need to follow if you want to know the SSID and password assigned to your Netgear range extender. This is to inform you that the process will be quite similar to accessing mywifiext.net for the Netgear extender. Also, we will take notes of the SSID and password of the Xfinity gateway after logging in to it as they are as same as the Netgear extender’s WiFi details.
Firstly, we suggest you grab a well-working Ethernet cable and use it to join the LAN port of your Xfinity router to your computer/laptop. Be very sure that you are establishing a strong connection. We do not want you to come across internet-related issues while logging in to the Xfinity gateway.
You need to launch an updated internet browser on your computer/laptop now. After that, move to the address field and input the 10.0.0.1 Xfinity IP. Press Enter to reach the administrative page of your Xfinity gateway. In case you are not able to see the login page, refresh the web browser and try again.
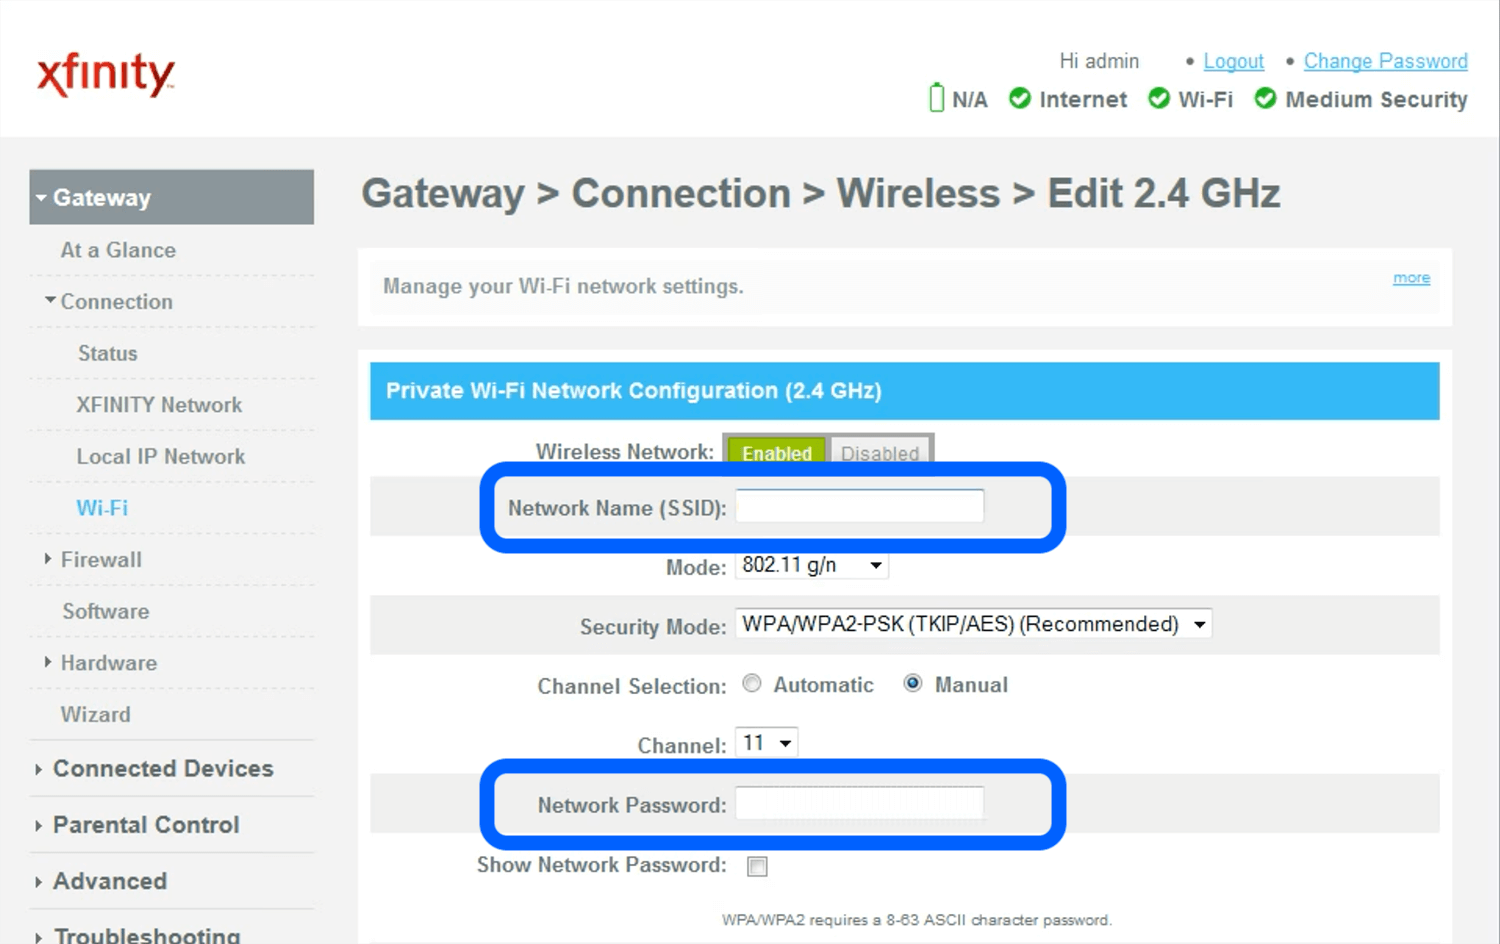
Input the administrative details of your gateway and reach the Xfinity gateway panel. From there, choose the GATEWAY option from the left-hand menu. Thereafter, select CONNECTION and choose WIFI. You’ll be able to see the SSID and password of the router under the Private WiFi Network tab. Note them down and use them to connect to the WiFi network of your Netgear extender.
This is how you can use the 10.0.0.1 Xfinity IP to know the WiFi details assigned to your Netgear WiFi extender. However, if you are in the mood for assigning different SSID and password, it is suggested that you disable the one WiFi name on your Netgear extender.
To disable the One WiFi name feature on your Netgear range extender, you are suggested to connect your laptop/computer to the Netgear extender. Once done, follow the steps highlighted below:
Our guide on accessing the 10.0.0.1 Xfinity IP address and finding out the WiFi settings of the Netgear extender running on the One WiFi Name feature ends here. We are hopeful that you will be able to complete the process successfully. We also shared the steps to disable the One WiFi Name feature so that your extender can run on different WiFi settings.
This must be known to you that as soon as you assign new WiFi details to the range extender, older ones will no longer work and you will lose internet access on devices that are currently connected to the network. Thus, you need to reconnect your devices to the new SSID using the new network key.
Tags: 10.0.0.1 Xfinity IP, mywifiext.net, Netgear One WiFi Name
Dave Francis is a WiFi network expert and a technical writer dedicated to helping users optimize their home networks. He focuses on providing clear, actionable steps to help readers get the best service out of their devices. With the background in Information-Technology and passion for WiFi devices, he provides practical advice and solutions for setting up and managing Wi-Fi devices. He breaks down technical issues and offers simplified solutions through easy guides and tutorials.

